What's Inside
- Ramification in an Olive Bonsai
- Check Vigor Before Cutting or Bending
- Choose the Trunk Line and Main Branches
- Build Fine Branching with Clip-and-Grow
- Mark Shoots Reserved for Flowering
- Wire Young Olive Shoots Gently
- Balance Seasonal Care with Flowers and Fruit
- Choose Your Olive's Next Training Move
Developing an olive bonsai requires balancing compact canopy architecture against the botanical mechanics of bloom production. By tracking physiological growth metrics and timing every cut to the tree's vigor, you can build dense twigging without eliminating future fruit.
Ramification in an Olive Bonsai
Ramification is the progressive division of primary branches into secondary branches and finer twigs. In Olea europaea, this structural refinement presents an immediate physiological trade-off. The repeated pruning cuts that build a dense, miniature canopy also remove the exact wood required for next season's blossoms.
Olea europaea produces flower clusters (inflorescences) in the leaf axils of shoots grown the previous season. A shoot shortened every time it extends has little chance to carry flowers the following spring. Because olive leaves grow in opposite pairs, every cut back to a leaf pair can stimulate two new shoots from that single node. Managing this opposite leaf geometry dictates every subsequent pruning decision.
A practical cultivation schedule allocates one full growing season per development phase: framework selection first, followed by branch thickening, and finally fine twig division. You evaluate each phase by the tree's physiological response rather than a fixed calendar date.
Check Vigor Before Cutting or Bending
A weak olive experiences every cut or bend as compounding stress. Before selecting a styling or pruning task, evaluate the tree's recent growth history, substrate drainage, and watering consistency. If the tree was recently repotted, look for a clear recovery signal: several weeks of steady new shoot extension carrying firm, normally colored leaves. Old leaves that merely stay attached to the twigs do not indicate root recovery.
Separate major root reduction, heavy canopy removal, and substantial bending into distinct growing sessions. Execute only one major intervention per session and measure the tree's response before scheduling the next phase. In regions with spring frosts, delay structural work until the local risk of frost damaging fresh wounds and tender shoots has passed.
Older olive wood turns brittle and splits easily under mechanical bending force. Thick, stiff branches with mature bark are candidates for gradual redirection—cutting back to a side shoot growing in the desired direction, rather than forceful wiring.
Choose the Trunk Line and Main Branches
Establishing the core architecture requires methodical observation before making any irreversible cuts.
- Step 1: Inspect the base and trunk line. Examine the root spread, trunk movement, and branch attachment points from several viewing angles at eye level before selecting a provisional front. Hold that front loosely until the primary branches confirm the composition.
- Step 2: Select the trunk continuation and primary branches. Identify a clear leader and useful primary limbs while retaining a substantial share of healthy foliage to drive recovery. Avoid stripping the tree down to bare primary branches in a single session, particularly if the roots were disturbed recently.
Remove dead or damaged wood first since those cuts carry zero design risk. Next, evaluate crossing branches, crowded junctions, and shoots that obscure the main trunk line. A sound primary branch attaches at an angle that complements the trunk movement, sits in visual proportion to the trunk section below it, and avoids emerging directly opposite another primary branch at the exact same height.
Where three or more branches emerge from a single node, the junction will eventually swell into an inverse taper bulge; reduce these clusters to two branches, choosing by direction and position rather than caliper alone. Leave temporary sacrifice growth unpruned for one or more growing seasons until the trunk or branch section below it reaches the target thickness, then shorten or remove it.
Build Fine Branching with Clip-and-Grow
Once the primary framework is set, bonsai practitioners rely on clip-and-grow techniques to build taper and twig density.
- Step 3: Allow selective extension. Let chosen shoots extend untouched until they establish useful length, vigor, and a readable direction. Avoid trimming every new shoot on sight.
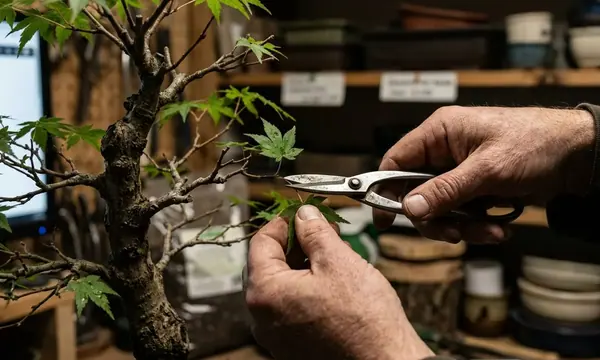
- Step 4: Shorten back to directional buds. Cut an established extension back to a suitable leaf pair or visible bud position, selecting the cut angle according to the branch's intended path.
Select the cut site by examining bud orientation: prune directly above a leaf pair whose axillary buds point toward open canopy space or along the desired branch line. Skip nodes whose buds point inward toward the trunk or straight up into an upper branch. Because olive leaves sit in opposite pairs, a single cut frequently triggers two shoots from the same node. Once both shoots harden enough to show their trajectory, keep the better-positioned shoot and reduce the second. Leaving every opposite pair intact creates rigid, bar-shaped junctions and localized swelling.
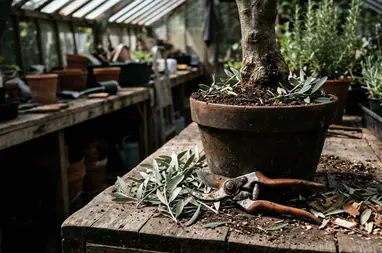
A single branch can operate in two growth modes simultaneously: leave inner thickening extensions long while keeping outer silhouette-maintenance shoots short. While Olea europaea readily pushes latent buds from older wood, exact emergence points remain unpredictable, so avoid banking a specific branch design on a single dormant location. Track structural progress through three visual benchmarks: a clearer caliper distinction between thick inner limbs and fine outer twigs, even spatial distribution between shoots, and direct sunlight reaching interior foliage.
Mark Shoots Reserved for Flowering
How do you secure spring blossoms when routine canopy refinement removes one-year-old wood? Because olive inflorescences emerge from axillary buds formed on the previous season's growth, repeated indiscriminate shortening eliminates flowering opportunities. Marking specific extensions ensures they stay intact through winter to bloom the following spring.
Reserve these fruiting shoots strictly on the outer canopy where they receive strong sunlight and where an extra season of unpruned length will not distort the overall silhouette. Avoid reserving interior twigs or structural leaders. Check the thread loops during every pruning session to confirm visible slack remains as the wood swells.
A thread loop on a reserved flowering shoot is a reminder, not an exemption. Once the olive is weak or freshly root-reduced, that shoot is shortened along with the others. Prioritize vegetative recovery and structural integrity over fruit production whenever vigor drops.
Wire Young Olive Shoots Gently
Padding a thick olive branch with wet raffia or wrap tape to force a heavy bend is a common temptation. While wrapping protects the outer bark surface from tool marks, the underlying heartwood retains its natural stiffness, leaving the risk of an internal split intact. Restrict wire application to young, flexible green shoots requiring modest positional adjustments, and return lignified, rigid wood to the clip-and-grow cycle.
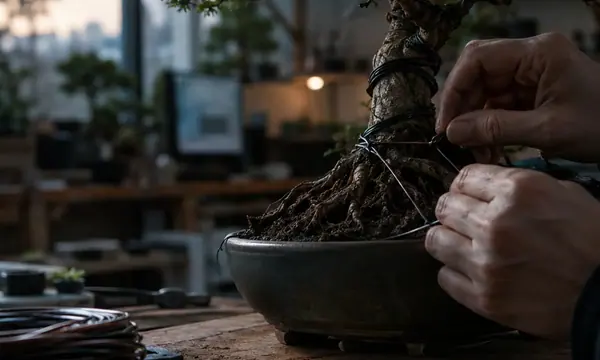
- Step 5: Apply anchored aluminum wire. Select soft aluminum wire measuring roughly one-third the diameter of the target shoot. Anchor the wire securely on a neighboring branch or across the trunk, then wind it at an angle in the vicinity of 45 degrees so the coils hold the bend without stacking tightly.
- Step 6: Position with close finger support. Support the shoot right at the bend fulcrum with your fingers and ease it into position through small adjustments. Stop immediately if mechanical resistance spikes or faint cracking sounds occur.
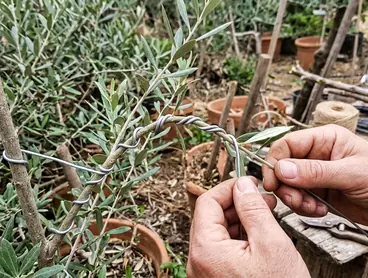
Verify that slight clearance remains visible between the wire coils and the bark, ensuring no leaves or axillary buds are crushed beneath the metal. Vigorous olive shoots expand rapidly during active growth, so inspect wired sections every one to two weeks. Remove the wire before it bites into the epidermis by snipping each individual coil with bonsai wire cutters—unwinding wire twists fragile olive shoots and tears tender bark.
Balance Seasonal Care with Flowers and Fruit
- Step 7: Align cultivation & care with physiological stages. Manage the tree across five distinct phases—recovery after work, active shoot extension, shoot maturation, flowering, and fruit development, rather than following a rigid monthly calendar.
Each stage dictates your operational priority: shelter roots and foliage during recovery, prune unreserved shoots during active extension, and leave the canopy undisturbed during bloom. Maintain the olive outdoors in strong sunlight. A dim indoor windowsill will fail to drive the photosynthetic density needed for dependable flowering. When moving a tree out of sheltered winter quarters, acclimate it to direct sun over one to two weeks by starting with morning exposure and gradually lengthening the duration.
Irrigate thoroughly whenever the substrate surface dries, maintain rapid drainage, and skip deliberate drought stress as a bloom-inducing tactic. Many olive cultivars require a winter chilling period to trigger flower bud differentiation, though exact chilling hours vary by variety. In regions where winters stay mild, a container olive may receive too little winter cold to bloom at all, even with strong sunlight and preserved one-year shoots—growers in those climates should treat fruit as an occasional bonus. Conversely, during hard freezes, shelter the shallow bonsai pot because container roots freeze at air temperatures the upper trunk easily tolerates.
Olive flowers are small and primarily wind-pollinated. Because several cultivars are partially self-incompatible, a solitary or unidentified tree may bloom heavily yet set zero fruit. When an olive blooms but sheds every tiny fruit, look first at cultivar compatibility and pollination. The clip-and-grow cycle is not the culprit, because it already left the marked one-year shoots intact. On a tree still building primary structure or showing weak extension, pinch off most developing fruit shortly after set to preserve carbohydrates for root and shoot growth.
| Symptom | Check first | Questions to ask | Likely adjustment |
|---|---|---|---|
| No flowers at all | Pruning history | Were last season's shoots shortened repeatedly during routine trimming? | Mark and preserve selected one-year shoots on the outer canopy through winter. |
| No flowers on unpruned shoots | Light and winter exposure | Did the tree receive strong outdoor sun and adequate winter chilling for its cultivar? | Move to full outdoor sun after gradual acclimation; recognize mild winter limits. |
| Heavy bloom but no fruit set | Pollination and cultivar | Is the tree a solitary, partially self-incompatible cultivar or sheltered from wind? | Place near compatible blooming olives in open airflow during spring flowering. |
| Weak growth during fruiting | Crop load vs. tree vigor | Is the tree still building structural framework or recovering from root work? | Remove most developing fruit soon after set to redirect energy to shoots and roots. |
Choose Your Olive's Next Training Move
Match your upcoming session strictly to the tree's current physiological readiness by reading these vegetative signals:
- If the tree shows persistent wilting, leaf drop, pests, or weak extension: Defer all styling and correct the underlying irrigation, drainage, or pest issue first.
- If working with vigorous raw stock lacking a settled front: Select the trunk line and primary branches, remove multi-branch whorl congestion, and leave sacrifice growth in place to thicken the base.
- If refining an established framework with healthy shoot extension: Shorten overgrown shoots back to outward-facing leaf pairs and keep your marked flowering shoots intact.
Walk out to your bench right now, inspect your olive's current shoot extension, and tie a loose loop of colored thread around the single branch you intend to develop next before picking up your cutters.